Subsurface Scattering Material for Characters
As part of the Character art responsibilities I also work on researching technical requirements for making good looking characters in game. The first are the basic maps required; your Albido or Diffuse map, Roughness Normal Map, and Specular maps are all important for characters. How you make these maps is up to you but for this we are going full PBR. It's all well and good to just plug these maps in however characters suffer from something that other objects don't; they need to look alive. In short, blood needs to be running through the body, or in our case it needs to LOOK like it's running through the body. That is where Subsurface Scattering comes in.
First let's define what exactly Subsurface Scattering (SSS) is. SSS is a mechanism where light penetrates the surface of an object and gets scattered by interacting with the material and exits through the surface at a new point. In the case of humans, light goes through the skin and interacts with the subdermal layer of the skin and illuminates it while passing through creating a very noticeable highlight in areas like the ear and the nose cartilage.
Here we can see some examples of SSS in the real world from movies and photos. As you can see it's very noticeable in the Ears and the hands. This makes it even more pertinent that subsurface looks good in game, because the hands and face are the most expressive parts of the human and thus, the first place we look at to gauge a character's realism.
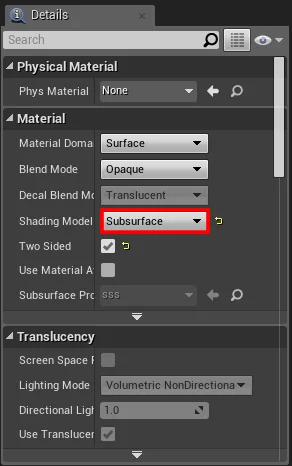
Unreal Engine 4 has several different shading models for Subsurface Scattering. For our model we are going to use the Subsurface shading mode.
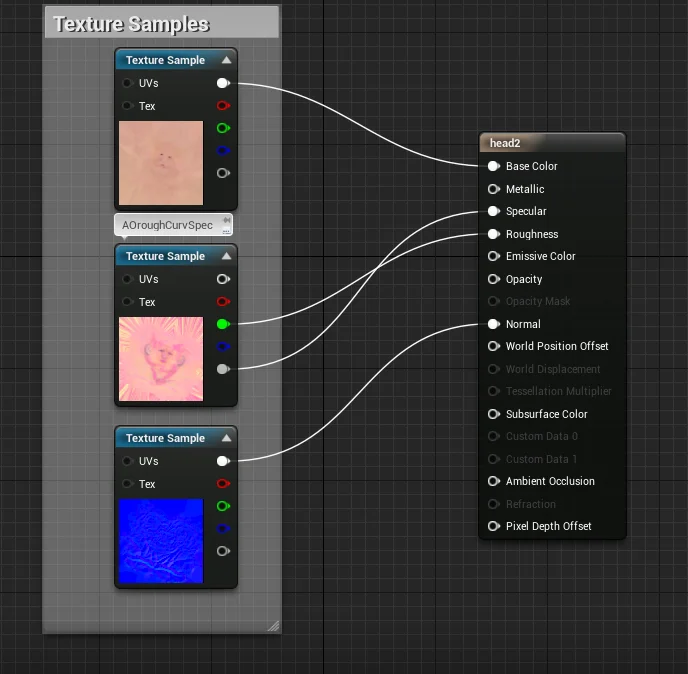
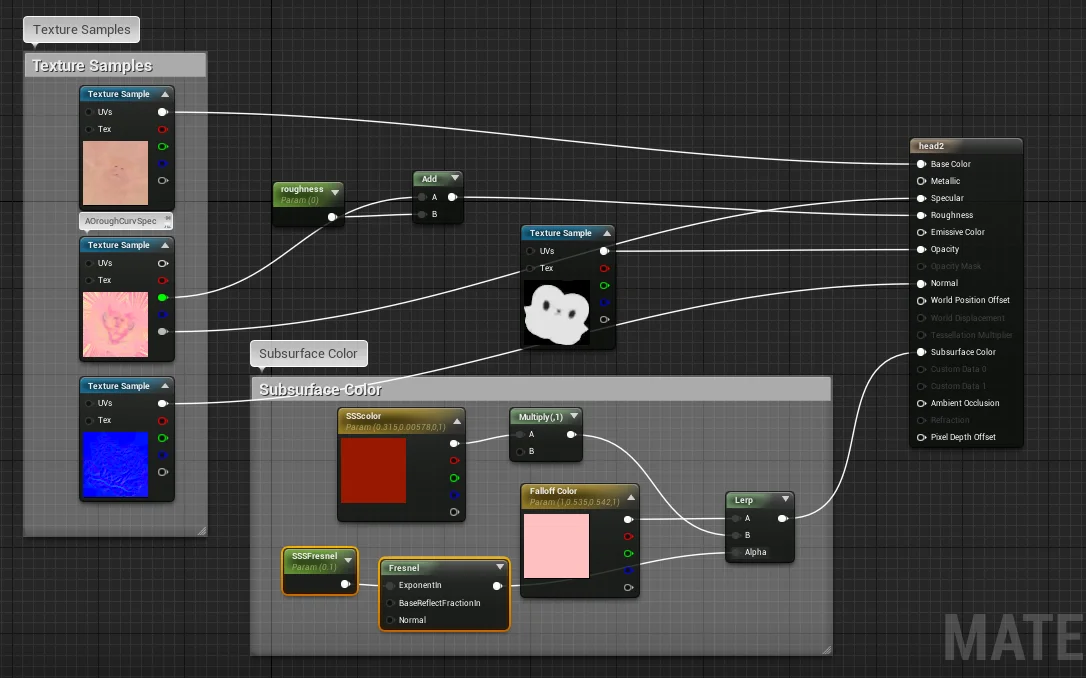
Next is Plugging in our Albido, Normal, Spec, and Roughness. I like to pack my grayscale maps into one texture to save space, but you can do what you want with your own model.
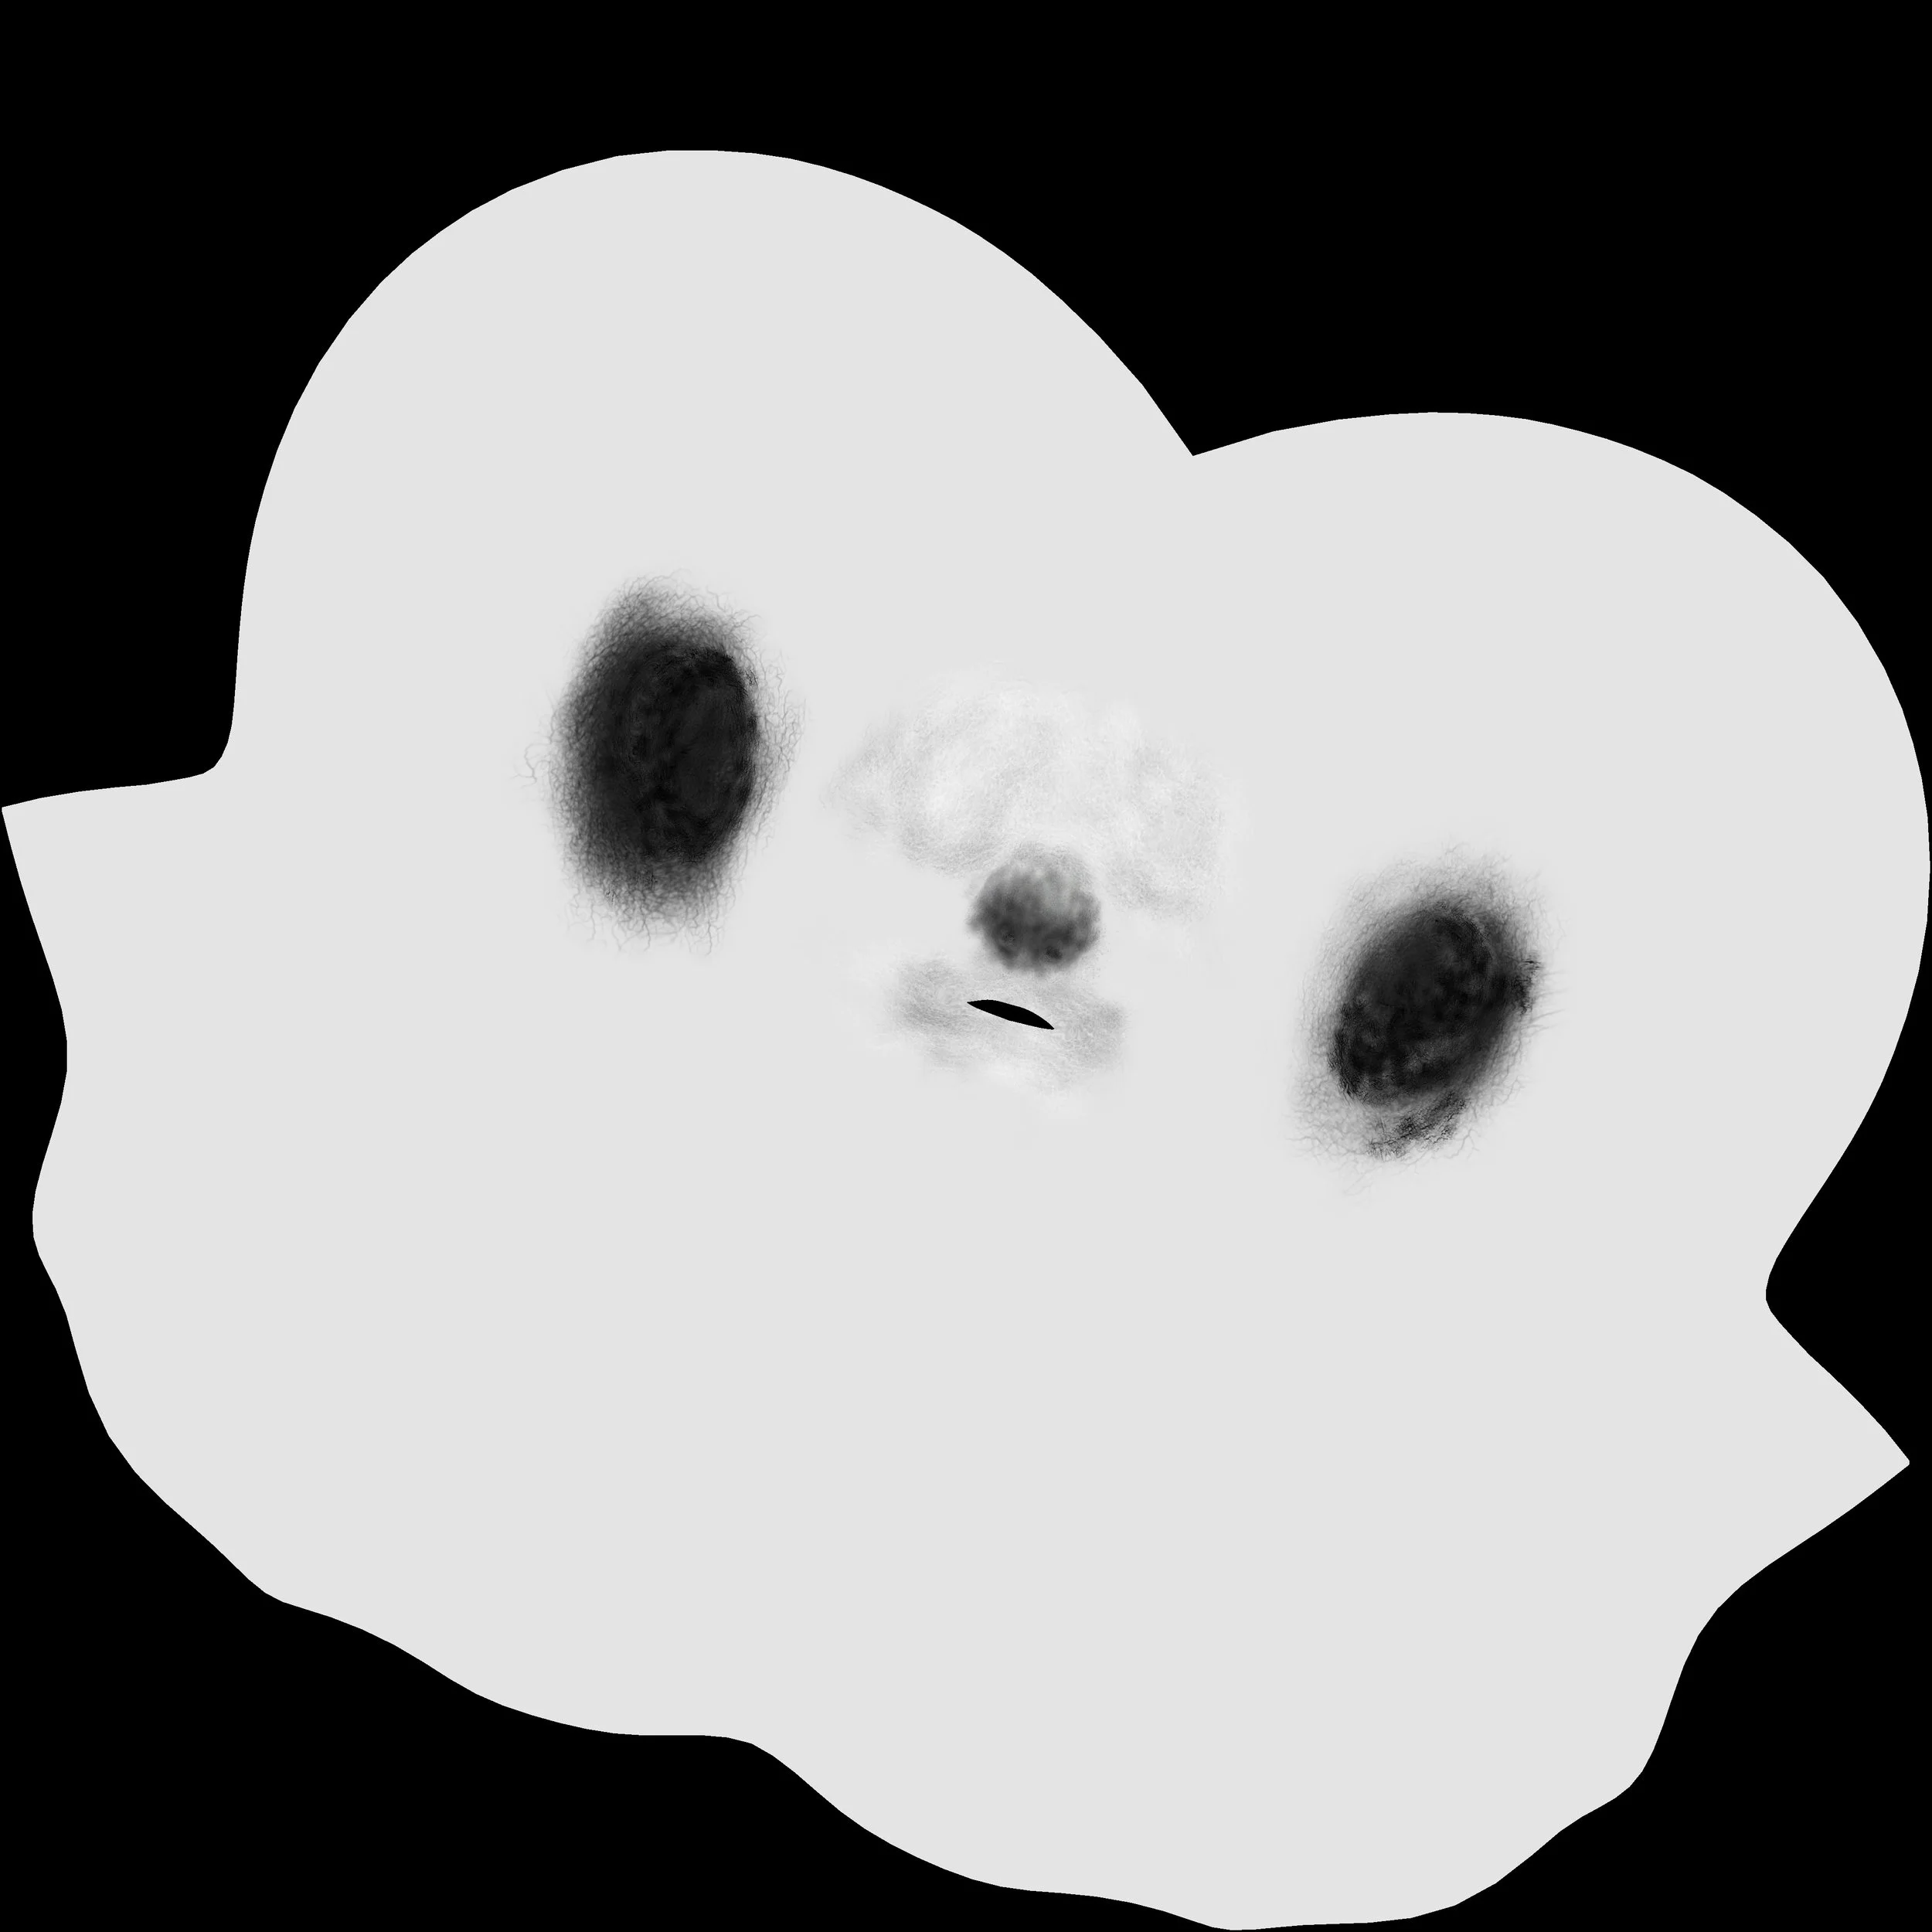
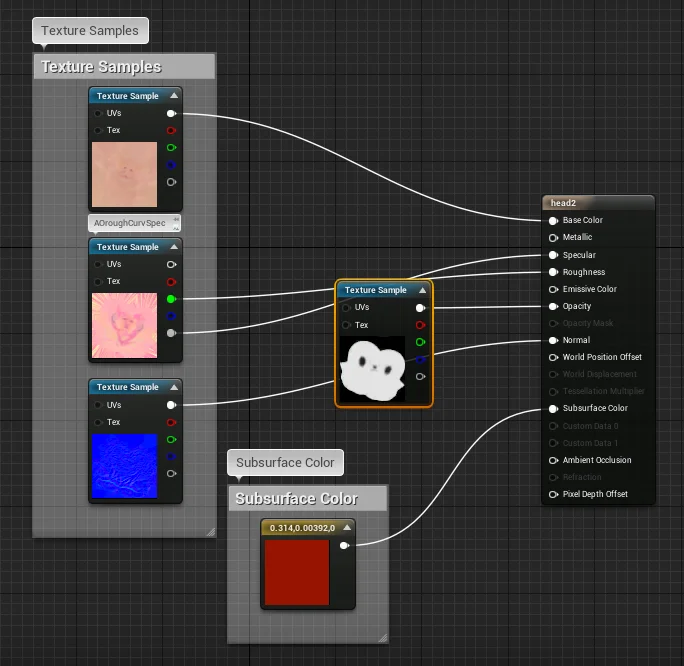
Once these are plugged in we can take a look at the Material Result node. We can see that with the subsurface shading model open, there are two new pins available to us; opacity and subsurface color. The opacity map is a grayscale map where black allows the most light to pass through, and white allows no light to pass through. An example of this map would look like this.
Pay close attention to the ears and the nose. These are the most important parts of the face for SSS so we can make them full black for now. A more detailed sss map could include variations of grey in the nose and ear area but right now we are looking mostly for effect. Go ahead now and plug your opacity map into the opacity pin. If you don't have one or can't make it, you can use your Ambient occlusion map.
After we plug in our mask we can see some of the changes to the body. We have a three point lighting solution set up and we can clearly see backscatter which is great. However there are some very clear and present issues. First is the most obvious which is our diffuse map has been completely washed out, the second is the nose opacity is way to harsh, to the point where you can see it even with no direct scatter.
After the revisions you can see that we faded the nose more delicately and the new result is way more desireable.
So, we now have a desireable mask, however we still have the very bad pale look going on that we need to fix. The main reason for this is that we have no color plugged into our subsurface color.
After plugging in our subsurface we can start to see some better results from our material.
Now we are starting to get somewhere, however there are still some issues, he's too red and the backscatter is orange. this is mostly to do with a lack of gradation, and no proper illumination or rim that occurs on good SSS. In order to get this effect we need a few things. A multiply, a fresnel, and a second color node. The reason for the multiply node is so that we can manipulate the amount of illumination that is actually happening in the SSS color. As default we can set this to 1 so that nothing is changing but it is always good to keep options open with a scalar parameter. The falloff color can is what we use to create the highlight rim that appears so vibrantly in real life. In order to blend these to we can lerp them together and check the result.
So we are getting a better skin tone but now our color in our backscatter is gone, this is because we have a perfect blend right now, and we need some kind of alpha to create the rim around the head.
I made a scalar parameter for the Fresnel exponent so that I could play around with the size. For default I made it 0.1. Now let's take a look at the final result!
Thanks for reading this post if you want to see more work like this visit my portfolio website; http://jongilboa.wixsite.com/grumpfrog
Jonathan Gilboa
Art director and Character Artist


